Friday, December 26, 2014

Old Sweater Mittens (how original)

I am sure you all have seen a million DIY posts about making mittens from old sweaters. Here is yet another one for you. :)

There was this old sweater I found at Goodwill when I was like... 19. I loved the color, I love the kind of mohair-ish look, and it fit me perfectly. Back then. Now, not at all! It is basically a belly shirt.

Somehow I ended up keeping it, all through my time in the military, back and forth across the country, West, East, North, South... and then I found it in some of my old stuff right before we moved. I still love the color of this sweater and with so many memories, I didn't want to just donate it. Plus it is so soft!

I decided to make mittens out of it so I could keep some of the sweater I loved so much.

First, I drew a mitten hand on a piece of paper and then drew another line outside of that, making room for stitching.


Next, I cut out the "pattern" I made and pinned it on the sweater. I used the finished edge at the bottom of the sweater for the bottom/opening of the mittens. 


Then I pinned the pieces right-side-in and sewed them down. 


I had to make a few adjustments to make them even (the chance you take when eyeballing something). They turned out pretty well and are so warm! Excuse the picture, M took it for me, since of course I can't do anything with a touchscreen phone while wearing these beauties!


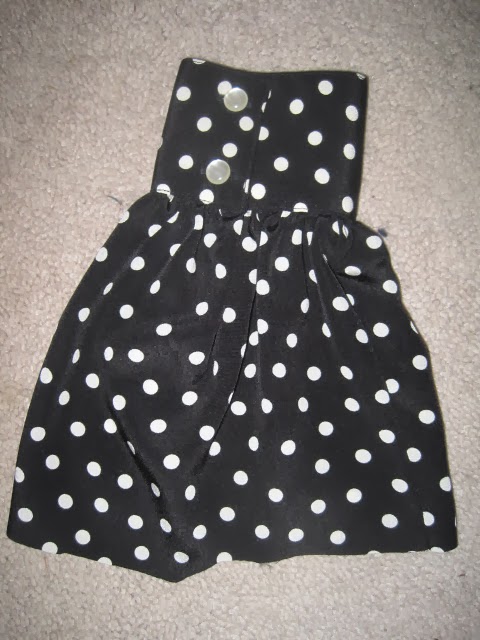
Since the original sweater had some buttons up on the shoulder, I decided to take those off and add them to the backs of each mitten.


I am really happy with the results of this simple little project!

Have you made these before? Happy New Year!!! 

Sunday, November 23, 2014

Santa's bringing homemade sugar and salt scrubs this year!

This year, M and I have been totally stumped thinking of Christmas gifts for our families. Our parents already have everything they want, and our siblings pretty much do too. Because of that, we decided to do a lot of little things for our family members, and to try and go handmade as much as possible. Who doesn't love something handmade that they can use? I hope our families will love these homemade sugar and salt scrubs. 

First, I made a Pumpkin Pie Scrub, and found the recipe here. I added just a little more pumpkin pie spice than the recipe called for and it came out perfectly! 

Next, I used the recipes I found on that page to make a tangerine vanilla face scrub (which can be used pretty much anywhere, not just your face). To make that one, I added 1/2 cup of sugar and almond oil, 1 tsp. vitamin E oil, 1 tsp. vanilla extract, and 9 drops of tangerine essential oil. 

Then I found this recipe, and made both a lemon and thyme salt scrub and a lemon and lavender sugar scrub using it. 

Here is what I used... (sugar not pictured). We even grew the thyme ourselves during the summer! 


I love lemon zest!

I doubled the recipe... so here are my two teaspoons. Smells amazing already!


The final product! Pictured here: lemon thyme sea salt scrub, lemon lavender sugar scrub, brown sugar pumpkin pie scrub, and tangerine vanilla sugar scrub.


The only thing left to do is to cut out some pretty pieces of fabric to wrap around the top of the little jars and make cute little labels to tie on with festive ribbons. 

I used some of the pumpkin pie scrub in the shower yesterday, and it is AMAZING. I smelled like a cookie and it made my skin so soft! 

Are you doing handmade gifts this year? What are you making? I would love to hear about it. :) 

Wednesday, November 19, 2014

How Much Do I Love Influenster?

...Let me count the ways.

First of all, I really enjoy the new interface. It is really easy to navigate and understand. Plus, all of the surveys (known as "snaps") are really fun to fill out, and I love that I can see all of the campaigns I qualify for right there on my dashboard.

I am always so excited to see that I have qualified for something new and to share what I receive here on my blog!

This blog post is even part of a Influenster's BlogSTAR VirtualVox Campaign!

To anyone who wants to use Influenster and would like an invite, I would love to send you one! I will just need your email address. :)

While you're at it, you might want to check out this post I love on The Hub- 6 Stores that Sell Super Comfy Sweaters. Fall and winter are my favorite seasons- I love staying warm. <3


Sunday, November 16, 2014

Free the Lumberjack Plaid!

I LOVE LOVE LOVE fall and winter, and I LOVE lumberjack/buffalo plaid. I have pretty girly style, so I find it challenging to wear plaid and still achieve the look I want. However, when I found this dress (FOR FREE), I had to have it.

I found this lovely piece of 90's, Dollar General store fashion at the swap on base when M was overseas. I have been saving it for a year, procrastinating and waiting for cooler weather. I was super motivated yesterday and decided that the cold weather and the occasion were perfect for this cute, warm little number. Yay!

I did not get a "before" picture of me wearing it, but it looks pretty pioneery. I also thought for a minute that it might be pajamas or a house robe (which I would still have worn as clothes, ha!), but the belt told me otherwise. Here it is before I got to it (complete with shoulder pads):


Whoever bought it back in the day paid $5.00 on clearance. I got it for free and it had never even been worn !


So I removed the shoulder pads, shortened the hem, and thought it would be perfect. However, I noticed it was kind of saggy in the boob area and looked boxy up top. I thought adding some darts in the "under boob" area (gosh I am so eloquent) would help, and it did! I also found that the sleeves were very baggy (ah, the 90s) and so I rolled them up because they looked a lot more like pajamas or a pioneer dress rolled down.

A perfect outfit to wear in the cold weather when you're going to Medieval Times for a friend's birthday dinner. :)


Hope you like it! What are you wearing to stay warm? 

Wednesday, September 3, 2014

Infinity Scarf From Old Tee Shirts!


Fall is coming! Comfy coats, pumpkin everything, cool weather, cuddling, boots, fall colors, and... SCARVES! 

This is the perfect time to start getting ready. Do you have any old tee shirts around your house? Personally, I hate throwing things away when I know they still have a lot of life in them. Why not make yourself a soft, comfortable infinity scarf for fall and winter? :) 

Guess what? I have already made one of these. I made one last fall when I had some of my husband's old tee shirts and didn't know what to do with them. After it turned out so well, I was totally kicking myself for not taking pictures along the way.

Well, this time I did. 

Here are the tee shirts before I got to them with my scissors. 


I cut across the chest, so I would be left with only the bottom part of the shirt. I gave the tops to my dad for rags in his wood shop. :) See? No waste!


I then cut the seams off of the shirts on the sides and the bottom, so for each shirt I would be left with two squares. I pinned them together to make one really really long flat strip. After I sewed that together, I folded the long strip together "hot dog style", right sides in. I sewed down the open side so that I would be left with a long tube. I turned that inside out and fit one side of the tube into the other one and sewed it down. I know that sounds like a lot, but it was so easy!


Here is the finished product!


Tuesday, July 1, 2014

Baby its NOT cold outside... My DIY fail.


So let me begin by saying that I cannot believe how fast time is flying! So much has happened, as I have previously written about. Now, my adoring husband M is here in the DC area (we were living apart for a while due to our desire to both remain employed through the transition for me from student life to working and our relocation to the expensive DC area from Georgia), and it is his turn to go to school while I work. I hardly ever have time to post anymore, but I am trying to get better about it!

Anyway, one of the items on my 14 Before 2014 list (that I completely failed at, by the way) was a DIY Cooling Spray. I wanted to make this mostly for my mother, as she is having some trouble with hot flashes and I hate to see her uncomfortable!

Now that it is actually hot outside, I thought I would make some extra.

I found a recipe for DIY cooling spray here, but decided to change it up just a little bit. I did not have cranberry juice, so instead I used more water and more witch hazel. I did not want the aloe and the glycerin to make it more gel-like than it should have been, so I had to make sure the consistency was the same. I also did not have ginger essential oil, but instead used peppermint. I like a minty finish to things like this, so I thought my mom would like it too.

Here are all of my ingredients:


This recipe only makes enough for one of these little spray bottles, so I


The verdict after using it? A very disappointing sticky feeling. My mom definitely won't like this!

Wahhh. I hate wasting my time on DIY fails! Have you ever had a DIY fail? I would love to hear about it (misery loves company, haha!). 

Friday, May 9, 2014

Loud 80s Shirtdress Refashion

I have had this loud 80s dress for a while now, just sitting, waiting for me to do something with it. Of course... I could not just wear this alone. It is terrible! Especially the shoulder pads... ugh. How I hate shoulder pads!

You see what I am talking about...


Here it is on my dress form: 


Please pardon the mess in the background. I took that picture several weeks ago when it was still snowy outside. So many shoes in the entryway! 

Anyway, I hate some stuff about this dress, but I thought it had a lot of potential, especially since this skirt length is actually in style right now! 

I began by grabbing my seam ripper, intending to remove the sleeves. I realized when I went to remove them that there were some weird little flaps that go over the shoulders (making them even MORE pronounced... as if shoulder pads were not enough!). I ripped those apart too, and took off the sleeves. 


Clyde "helped".

Those flaps left quite a bit of fabric once they were undone (since they were just folds), so I had to cut some of it off before sewing it so that I would not be left looking like I was wearing one of those 80s cut off sweatshirts. 


I then cut off the collar...


And began the difficult task of folding the fabric over to create a finished edge. That part is always my least favorite, as this fabric (along with many others) is slippery and can bunch easily. I pinned, sewed, and added a belt.

What do you think?


I hope you like it! I think this will be great with some sky high wedges too.


Sunday, May 4, 2014

A Special Mother's Day Upcycle

Hello everyone, I have not been so creative lately. Well, I guess I should say I haven't been super motivated. I have been so busy... both with work and with May being the month that everyone seemed to want to visit, it has been crazy!

As many of you know, my beloved grandfather passed away in December. I was incredibly close to him, and of course my mother was really close to him. I traveled down South to grab some of Grandad's clothes to use for various special refashions in the future, and I thought my mom would like to have something made from his clothes.

...So I made some cute throw pillows from some of my Grandad's old button-down shirts.

These are not the shirts I used, because I chose two others at the last minute. However, you get the idea. I used these two 16"x16" throw pillow inserts that I got from Michael's.

I laid the shirts out, cut the sleeves off, and then cut the top of the shirt off. After that, I turned the shirt inside out and laid the pillow on top. 


After that, I pinned the fabric together about an inch or so larger than the outline of the pillow. Then I sewed it down on all sides (normally you would leave an opening to turn the fabric right side in again, and stuff, but since the front of the shirt still opens with the use of the buttons, I could sew all of the sides down.). 


Afterward, I unbuttoned the buttons, turned the shirt right side in again, and stuffed the pillow insert inside. I buttoned it back up and voila! I was finished. These are a really cute, easy project. I think my mom will really love them. 


Are you DIYing Mother's Day presents? What are you making? I would love to hear about it! 

Friday, April 4, 2014

Spring Pink Refashion

I feel like I say this WAY too much lately, but it has been a while!

Life has become incredibly busy up here in the DC area, and I am adjusting nicely . I just cannot believe how fast time seems to go by here.

Anyway... recently I had to go back down South to help with some family stuff (which can be so complicated, and is another reason I have been neglecting my blog), and I was lucky enough to get to go to my favorite stuff-a-bag-for-$4 thrift store! I found a few gems, and I thought this outdated pink dress would be the perfect color for spring.

This has to be from the 80s, right?


Please excuse all of those shoes in the entryway! This dress had a lot of positives the fact that I could put a belt with it, the zipper up the back is nice and sturdy, and the color is great. The negatives: WHAT IS THAT WEIRD DRAPEY THING?? and it was just a little too long. It is also just a little bit big for me, but I figured that could be taken care of with a belt. :)

Oh, and of course it had shoulder pads.

I took them out, and used a seam-ripper to detach the weird drape. It was a little complicated to remove the drape because the fabric attached to it from the back formed a kind of pocket that the other side fit into. It was just a little tricky to sew back together without it looking awful.


The next thing I had to do was shorten this just a little bit. I wanted this to be a nice spring dress to wear to work, so I definitely did not want it to be as short as I usually wear my refashioned dresses. I usually get the hem a little crooked, and I did not want to waste time, so I folded the original hem over several times. This made it a little thicker (and probably not what I would do in hindsight), but at least since it is heavier it will weigh my dress down and it will be way less likely to blow up at gas stations. I can't tell you how often that happens to me. Very embarrassing!

I apologize for the terrible selfie, but here is how the dress turned out:


Hope you're enjoying spring! I know I am! :) 


Tuesday, March 18, 2014

Thrift Score Tuesday

Hello!

I had to drive down south over the weekend to help with some family stuff. While I was there, I got a chance to go to my favorite thrift store with my mom and Granny! I was able to find several awesome spring dresses to refashion, and I found a few amazing pairs of vintage shoes. I always have such amazing luck there.

I have some very sweet refashions on the way, but I thought I would share with you my awesome thrifty footwear!

Here they are:

 The purple is so much brighter in person!


Sunday, February 23, 2014

Upcycled Manly Trinket Box

As you may know, M and I just moved into a new place in a new city! That move led to us getting some nice new furniture also. One thing we really like to have is some sort of storage for tiny things in our dressers (*sigh*, yes, we both have so much clothing that we have to have separate dressers), so I decided to repurpose a nice, sturdy little box that my work phone came in for my husband. I wanted to make him a manly little box to keep cufflinks, tie bars and other small things in.

So I started with this:


And then I simply cut scrapbooking paper to cover all of the panels, and glued a little wood-paper tie on the front... you know, to make it manly. :)


Cute, right? Now M has something to keep his trinkets in. What a nice, quick project for a Sunday afternoon!


Sunday, February 9, 2014

Polka Dot Love & My Big Update

WOW.

Our lives have been so crazy since about... November, with both happy and very sad events. Here is a little run down (even though I know I may have mentioned some of this already): in November, my grandfather fell ill (cancer, it turned out. He had it for a long time, but was able to stay active for a lot longer than many others). During that time, I was preparing to graduate with my MBA and interviewing for a job. My company flew me to Washington, DC for an interview! So... I got the job. During that time, my grandfather began receiving Hospice care. I graduated a week later, and walked in the graduation ceremony. I did it because my family wanted me to, but especially my grandad. My grandad was not able to attend the ceremony, but my parents were able to record the part where I received my diploma for him. He was so proud when he saw it. M and I had a Christmas trip planned to New Mexico, to visit his family, so we went. A few days before Christmas, my grandad passed away. The funeral was immediately after we returned from our trip, and the next day I left to drive to the DC area to look for a place to live. We found the perfect one, and two whirlwind weeks later, we were all moved in. Just two days after moving up here, I started my new job. We aren't quite unpacked yet. I cannot believe how much has happened in the last few months. I miss my grandad every single day, but I feel so lucky to have gotten stationed in a city that was 30 minutes away from my grandparents. I lived there for five years, and got to see them often. I got closure, and so did grandad. We were incredibly close, and even though I am heartbroken without him, I am just incredibly happy and thankful that I got such a precious gift in the time that I got to spend with him.

Needless to say, my goal of 14 projects before 2014 did not work out so well. I guess life just happens, right? I am not too upset about it. I will totally finish those projects though. :)

Now... drum roll please... a refashion! Yes, I am back in the saddle after a chaotic break. I started with this frumpy but salvageable polka-dotted dress that I got at a thrift store in South Carolina for about $1.00. Please forgive the before picture, M was not around to take a picture of me actually wearing the dress.

Here is the frumpy dress before I refashioned it:

I hated the puffiness of the long sleeves, and the length. The buttons are pearl-colored and arranged in pairs. I thought the two-button thing was cute, but not for the entire dress.

So... I cut the sleeves and sewed a hem at about 3/4 sleeve length. I also took off all of the buttons below the waistband and sewed the flap down so it cannot be opened. The buttons above the waist were really cute the way they are so I left them. Then I shortened the skirt and hemmed it.

It is too bad the sleeves were so puffy above the cuff. I like the cuff and the buttons, but the puffiness really dated the dress. 


Here is the finished product! I wore it to Annapolis to hang out with a good friend today (she was kind enough to take this picture for me, actually!), and this dress is comfortable and just sophisticated enough. I wore it with black tights and black ankle boots. :)


I hope you like it! Look for more from me now that I am settled in!