Hello again!
I was absolutely elated to have some time to do some sewing this week! I love sewing and I love refashioning things. I also love watching TV. As you can imagine, getting to do all of these things together was awesome for me, and very relaxing.
A few weeks ago, I was with my mom in the Salvation Army here in town, and they happened to be having a sale. I found this vintage, floral, very old lady-ish top, and thought that even though it had pirate sleeves, it had some potential. At $2, I figured, what do I have to lose? So I bought it.
When I tried it on at home, it looked AWFUL on me. I do not know what I was thinking... was I thinking I could make pirate sleeves look good? Was I thinking that maybe if I put a belt around my waist, it would balance the arms out? My arms looked like tiny little nubs coming out of an elephant's leg. I even tried the belt. No luck.
And also, no pictures of this. I am so sorry.
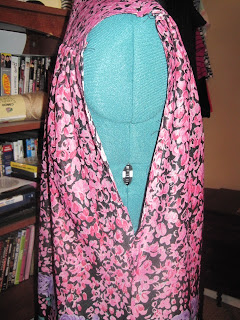
My dressform actually makes this old lady pirate shirt look kinda good.
Ha! I said KINDA good, not REALLY good.
So it has pirate sleeves and a very Amish neckline. On top of that, the pattern is very 70s old lady, and the bottom is flowy and could make me look pregnant if I did not wear it right. Like I said, though, it has potential. The pattern is actually kinda cool, and I like flowy done right. I can work with this!
First, I took a seam ripper and I removed the sleeves.
As you can see, I was left with some pretty big armholes, so I turned the shirt inside out and pinned them to be the size I wanted them and sewed them up.
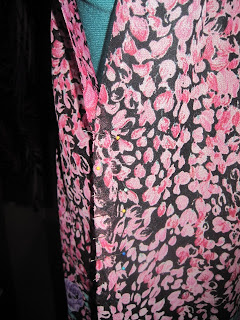
Next, I wanted to make sure the armholes were finished. Because I wanted the shirt to be sleeveless, I did not need to do much else than turn the raw edges under twice, pin, and sew! The only thing that did present a challenge to me is that there was some sort of ruching up by the collarbones on each side that affected the shoulder and the armholes. Luckily for me, the pattern of the fabric covered up any evidence that it caused a problem for me when I was sewing. Yesssss!
Ok, so I got so into sewing the belt/waist tie thing that I forgot to take pictures. I AM SO SORRY! But here is what I did: I took the sleeves, and I cut off any seams so I was left with just fabric. Then I cut the fabric into strips, and I sewed them together so I had one looooong strip. After that, I folded that strip in half, "hot dog style" and then pinned and sewed it, leaving one end open. After that, I trimmed any excess and then turned it right side out and turned the ends of the open side under and sewed across. After that it was kinda puffy, so I flattened it out and sewed down the sides on either side to make a flat belt.
Even though the neckline was too high for me, I figured out that I could leave the top two buttons undone and it would look just fine, so I did not need to do anything to that part of it. Here is the finished product on my dressform:
And here is the finished product on me:
I promise that in the future, I will not take selfies in the bathroom mirror to show you my finished products! This is a one-time occurrence, but my husband will be back from overseas in about a week and then I will have someone to take my pictures for me! :)
I really hope you enjoyed my old lady pirate-shirt refashion! What do you think? Have you ever seen potential in something that is borderline, or downright hideous? :)


